この記事はJetBrains Advent Calendar 2016の12/17の記事です。
Intellij IDEAだけではないのですが、Alt+Enter(Intention)は自分で拡張したものを作ることが可能です。
自己紹介
自分のページにリストされているIntellijプラグインページがページングされたらプラグイン開発辞めようと誓っていて、最近中の人と話したらページング機能ないけど?wと生涯現役プラグイン開発者としてやっていくことが決定した人間です。
Intentionだけではなく、Inspectionなども作成しており、Kotlinのコントリビュートもしています。Kotlinの主なコントリビュートもInspection/Intentionなので、ある程度説明出来るレベルだと思います。
想定読者
- Intentionを作ってみたい
- プラグイン開発に興味がある
- Intellijの機能をある程度理解している
- kotlinの文法がそれなりに理解できる
Custom Intentionを作ってみる
今回サンプルとして、Intention周りのプラグインをリリースしました。 https://plugins.jetbrains.com/plugin/9271
ソースコード https://github.com/shiraji/databinding-support
これをベースにXMLファイルに対してのIntentionの説明をします。
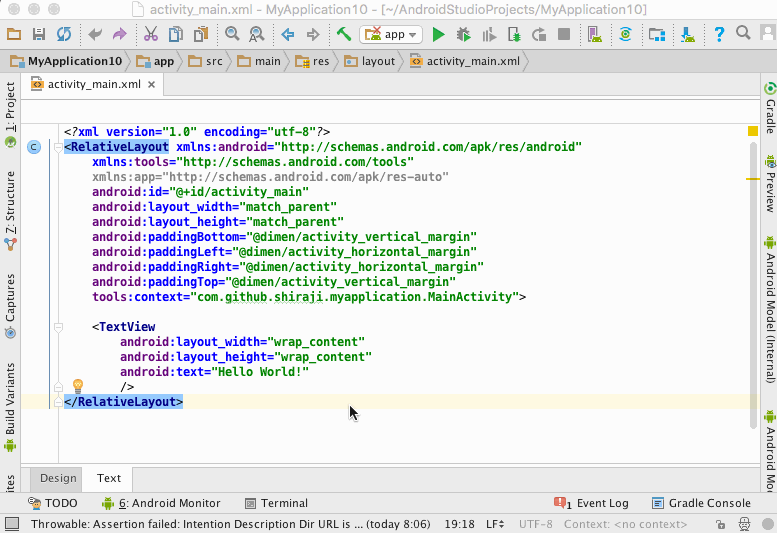
今回はレイアウトファイルであり、<layout>タグがrootタグではなかった場合、<layout>タグでラップするというIntentionを作成します。
プラグインの作成方法などは参考リンクにまとめてありますので、そちらを参照して下さい。
Intentionクラス
IntentionActionを継承します。以下のメソッドを実装する必要があります。
getText(): String
popupで表示される時の文字列
getFamilyName(): String
よくわからねw(intellij-community/kotlin repo内でもgetText呼び出してるだけのところが多い。)
startInWriteAction(): Boolean
Write Action内で実行するかどうか。
isAvailable(project: Project, editor: Editor?, file: PsiFile?): Boolean
そのIntentionを利用可能かどうか判定する
invoke(project: Project, editor: Editor?, file: PsiFile?)
Intentionが選択時に実行されるメソッド。
今回は実際に以下のようなイメージになりました。
1 2 3 4 5 6 7 8 9 10 11 12 13 14 15 16 17 | |
このrootタグかどうかとか、androidのレイアウトファイルかどうかの判定とか、何をどう書き換えるのかとかがたぶん一番難しい部分だと思います。ただ、ここはそれぞれのIntentionやプラグインで違うのでコード読んで頑張れwとしか言えません。。。
唯一ある共通点としてはファイルなどの読み込みや解析はPsiを使います。例えば、xmlタグだったらXmlTag、XmlAttributeを使います。PsiElement#replace()でソースコードの置換することが出来ます。
それぞれのElement作成それぞれのファイルタイプ毎にFactoryが用意されています。XmlならXmlElementFactoryで作成しています。Javaの場合だとPsiElementFactoryだし、KotlinならKtPsiFactoryを使います。
plugin.xml
Intentionクラスをplugin.xmlに定義します。
1 2 3 4 | |
Intentionの説明文を書く
自分はちょくちょく忘れるのですが・・・(実際これを忘れて、1.0.1->1.0.2のバージョン更新をした。)
こんな感じで設定画面に説明文を書くことが可能です。
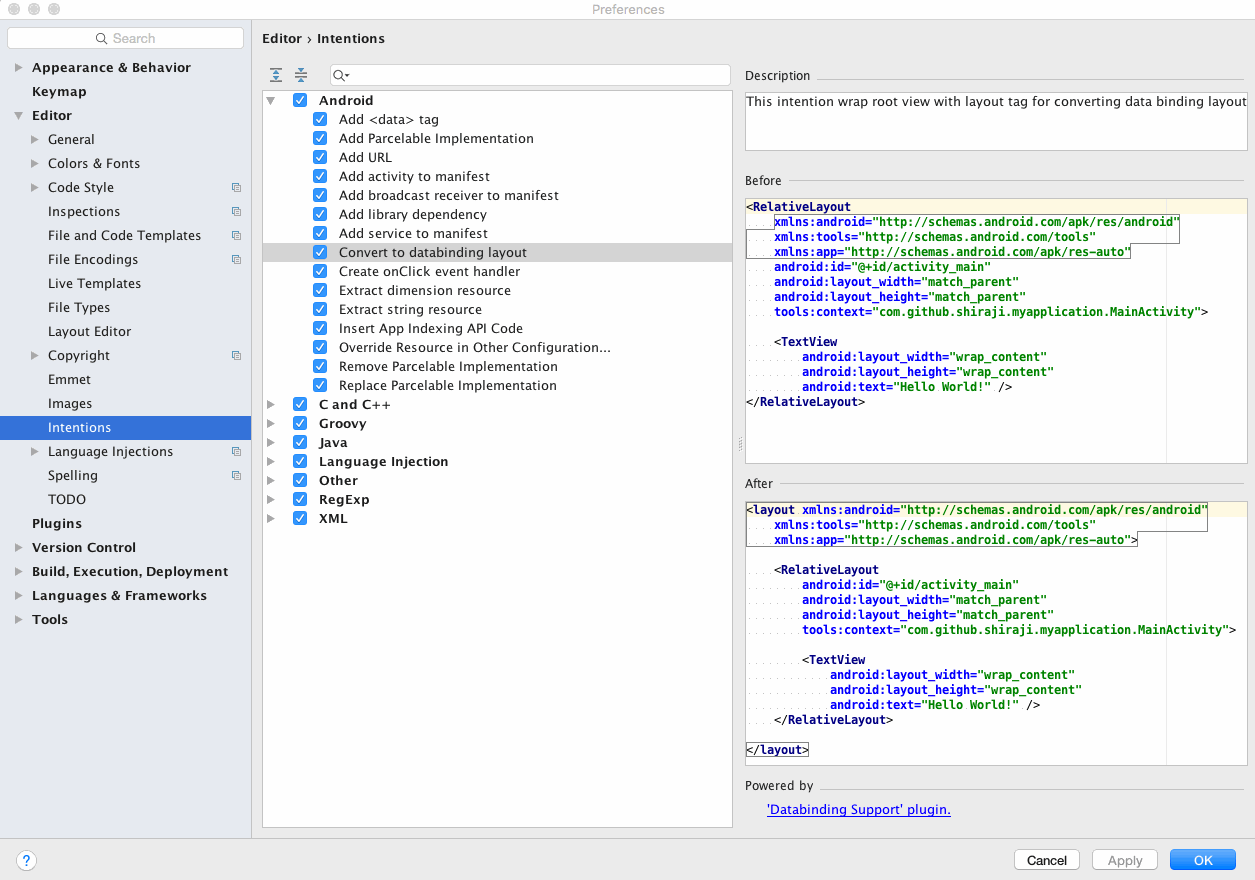
以下の3つのファイルを作成します。
- after.xml.template
- before.xml.template
- description.html
それぞれが表示されるのはここです。
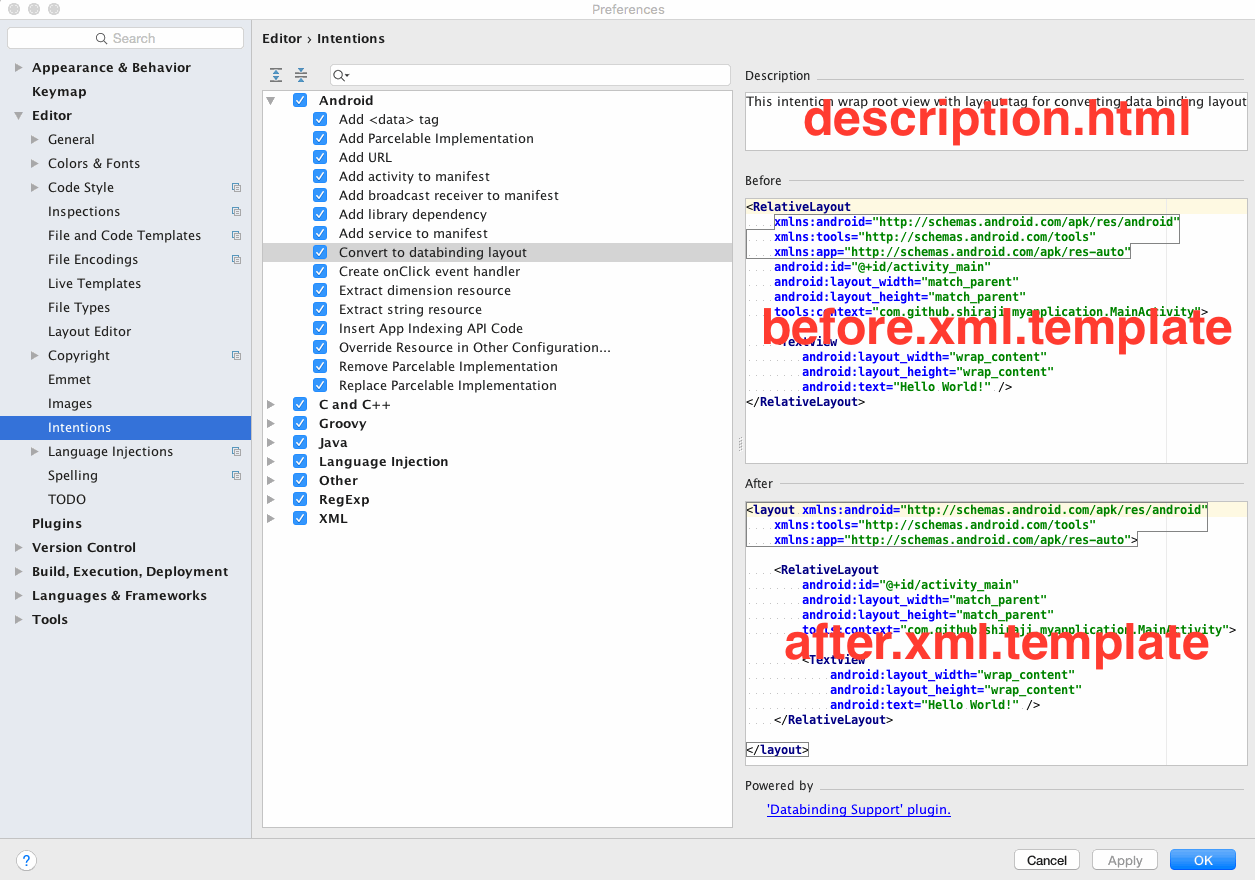
例えば、JavaファイルののIntentionだった場合、after.java.templateのようにファイル名をafter.{拡張子}.templateとすれば良いです。beforeのほうも同じです。
配置箇所はresourcesフォルダ/intentionDescriptions/INTENSION名/に配置します。
ConvertToDatabindingLayoutIntentionの場合、こんな感じ。
最後に
Happy alt+enter life!
参考リンク
IntelliJ IDEAクイックスタート – インテンション
http://samuraism.com/products/jetbrains/intellij-idea/quickstart/intentions
プラグインプロジェクトの作成手順
http://www.jetbrains.org/intellij/sdk/docs/index.html
gradleを使う場合
http://www.jetbrains.org/intellij/sdk/docs/tutorials/build_system.html?search=gradle
このgradleプラグインのセットアップウィザードはないので、gradle-intellij-plugin wizardを使うと便利だよ(ステマ)